Speed Variator Install

Speed Variator Install

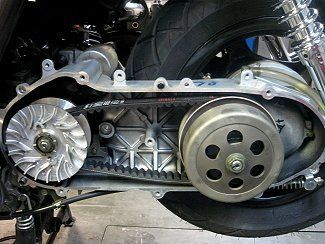
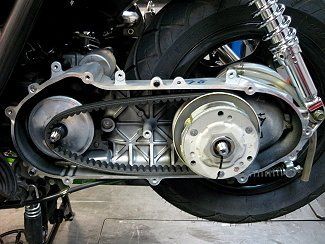
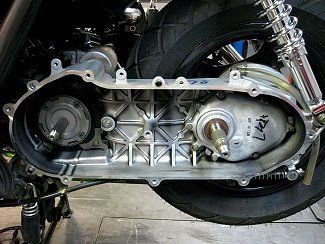
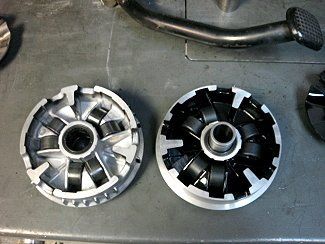
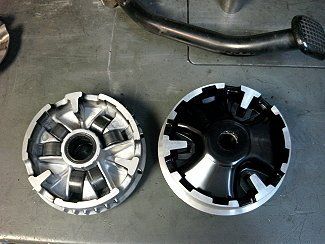
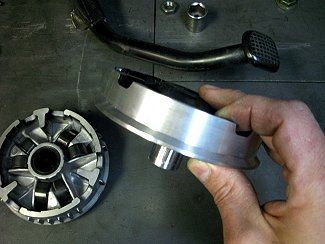
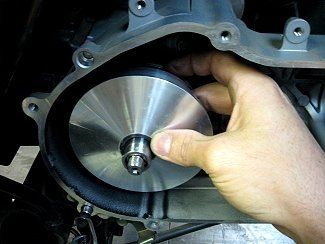
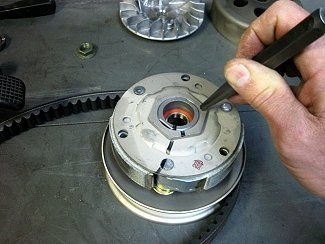
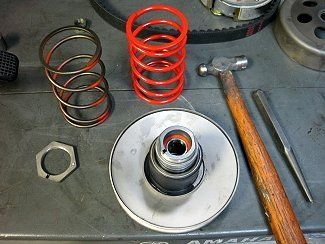
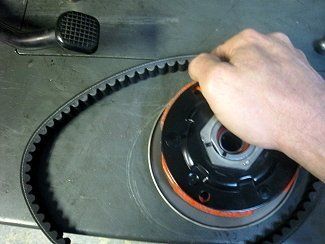
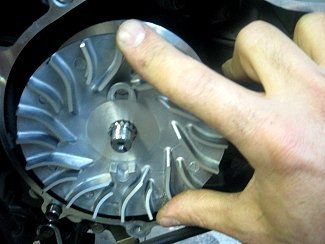
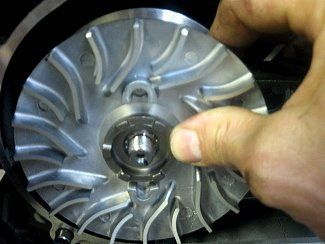
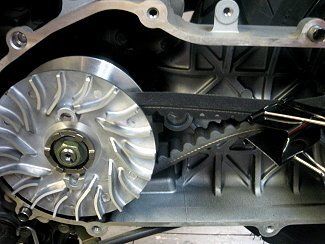
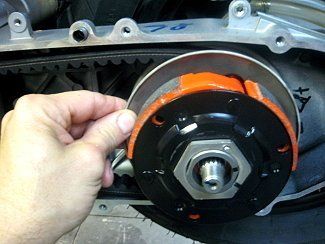
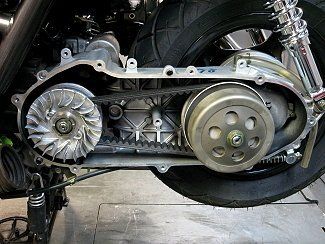
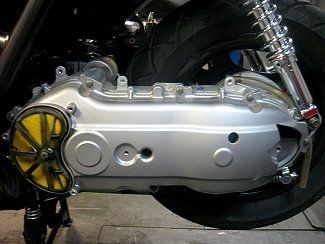
This tech is to help you learn how to install a speed variator, pulley spring and clutch.


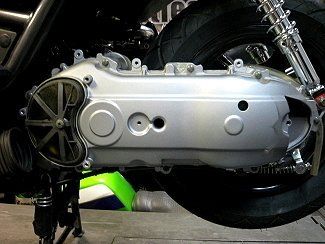
 We are using a Zuma 125 for the tech but this same concept applies to most small scooters.


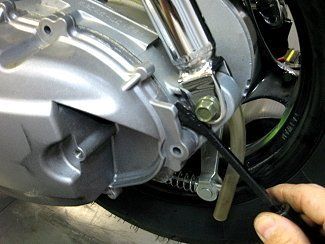
 You'll need some basic tools to do the job. These are the tools you will need for the Zuma.


 #2 Phillips Head Screw Driver


 #3 Phillips Head Screw Driver


 1/4" Flat Head Screw Driver


 Center Punch, Hammer, Variator Holder Tool, 1/4" Drive Socket Wrench, 19mm 17mm and 8mm sockets  +  Brains.

You will need the #3 Phillips to remove the large screws holding the plastic protector in place.


What you can't see is that the air intake tube for the drive is a bugger to get off. You'll need to remove the hose clamp completely with a #2 Phillips head screw driver to make life easier.


With the plastic removed you can see the 8mm bolts around the drive cover. You'll need to remove those as well as the one hinding in the middle of the cover.

BE CAREFUL The Zuma 125 has a fiber gasket to keep dirt and water out of the drive belt area.


Use a large screw driver or small pry bar to break the gaskets bond to the drive cover. The Zuma cover has castings build in just for this purpose.


This is one area that taking your time is a good idea. Gently work the cover away from the motor.


If the gasket wants to stay on the motor go with that. If it wants to come with the cover let it be. Don't fight it.

With the drive cover off you can see the variator (drive pulley) to the left and the driven pulley and clutch assembly to the right.


 You will need a 17mm socket for the nut holding the variator in place and a 19mm socket for the clutch bell nut.


 You can keep the shaft from rotating with a variator holding tool or by using a light duty impact tool. I say light duty because people twist the end right off the shafts all the time.

Now we are getting to the meat!


If you are just changing weights and have no plans to remove the clutch assembly now is a great time to put a clip on the belt as described later in this article. You don't want the belt getting nicked or cut from forcing it out of the way.


In this pic you can see how you drive looks when you are first taking off. As you go faster the belt will ride up the face of the variator (left) and down the face on the driven pulley (right).

Pull the variator and driven pulley assemblies off the shafts keeping in mind the way things are. You'll need to recall how things go back on.


 I've done this a thousand times so it's like second nature for me. I'm trying not to leave anything out or go over people's heads so please don't take offense if I'm talking down to you.

Here we have installed the stock drive boss into the new variator. Our variator even comes with grease where you need it. I'd check just to be sure there is grease (^_^) Lithium grease is best but you can use engine oil in a pinch. You just need to get the bushing broken in and that magic funk going on, belt dust seems to keep things going once the grease wears away.


 The ramps on the new variator are much longer as well as having a different ramp angle. The new variator is larger and has a belt face that get better acceleration!

Push down the drive boss so you can install the ramp plate.


This is a good time to make sure the ramp sliders are all installed correctly. You want the ramp to slide freely.


Oh, we are getting close. It's almost time to terrorize the neighbors!

When you pickup the variator make sure you hold the ramp tight against the rollers so they don't fall out of place.

Push the variator into place all the while making sure the ramp stays tight against those weights. If you space out on this one you'll be one of those guys who thinks the variator makes you slower.


 If the rollers get all wacky in there your scooter will still work but it will work bad.

f you aren't messing with the clutch skip along down a couple steps. If you do want the best performance change the clutch!


 You'll need a huge socket or brains for this one. We use a huge socket since we don't have brains but we'll show you the socket free way.


Use a SMALL hammer and center punch to make a mark on the retaining nut. Then hammer the punch in a counter clockwise direction to break the nut loose. Once the nut is loose you can push down on the clutch assembly and turn the nut by hand. You will need to push down on the clutch when you remove the nut. THE SPRING WILL FORCE THE CLUTCH TOWARDS YOU. If you have rubber arms you'll need to stand on the clutch assembly and remove the nut. Once the nut is off you can gently let the clutch up and lift it off.

Here you can see our new spring next to the weaker stock version.


You can also see our small hammer and center punch.


You can see here how far the spring pushes up the clutch assembly. It's not too scary but something to keep in mind when you remove the nut.

Just as before you'll need to move the assembly to the floor if you have rubber arms.


We push down and then cock the assembly to the side. That holds the clutch assembly down so we have a free hand to install the nut. Once the nut is started pushing down the clutch assembly is fairly easy.


Once again you'll use the center punch and hammer. This time to tighten the nut.


If you are worried about the nut coming loose you can use thread lock to keep things in place. We use green Permatex, it seems to work best.

Next work the belt into the driven pulley by squeezing the torque driver towards the clutch.


Keep in mind the torque driver twists so twist while you squeeze. Push the belt down into the pulley with your fingers.

Once you have worked the belt down into the pulley you can pinch the belt and install a clip to hold things in place. This will make it easier to finish the job.

You can use a big paper clip, clothes pin or adjustable wrench to pinch the belt.


Just don't nick the belt.

Here you can see why it's such a great idea to pinch the belt.


With the belt pinched it's easier to keep it off the drive boss. The slack makes it a lot easier to insure you are getting the drive face installed correctly.

With one hand position the belt away from the drive boss so you can install the drive face.

Push the drive face into the crank. Make sure not to force anything. You want the splines to line up so be gentle.

Install the hardware and use your thumb to keep everything in place while you put the nut on. Once the nut is finger tight and everything is seated you can take your hands off and pick your nose a little.

Here you can see the high performance drive face all snug as a bug. Make sure you get it tight. Again, if you are the worrying type I'd use thread lock on the nut.

Once the variator is secure you can remove the clip and rotate the driven pulley to get the slack out of the belt.


Lots of people skip this step but if your belt is slack you run the risk of firing up your scoot and having all your rollers fall out of place because the belt wasn't putting pressure on the variator.


Take the time to do this. It also keeps the belt from flopping around, wacking the inside of the drive and getting nicked.

This is a nice tight belt and we also went ahead and installed the clutch bell since we thought we would use it again.

The Zuma has a drive vent filter. Ours was nasty so it had to be cleaned.


If your filter looks dirty clean it with some Simple Green. You can squeeze the filter but don't get crazy and tear it. These last forever if you are nice to them.

We are all done. You'll need to install the plastic but you already know how that goes.


With a speed variator kit the Zuma 125 or any scooter for that matter will go from boring to party animal!


Of course if you like this tech we ask that you buy something from us. If you already did, Thank you.


Your help is always appreciated to keep things running and pay for dumb ideas.

Share by: