CV Carburetor Jetting

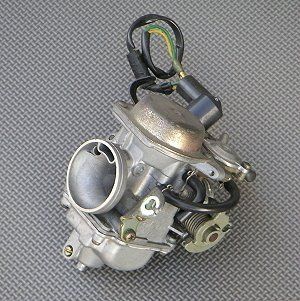
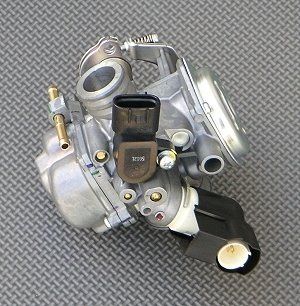
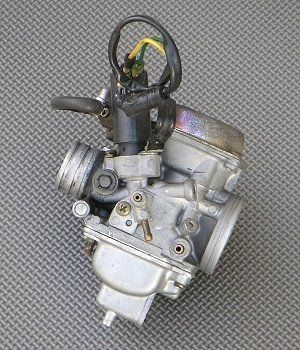
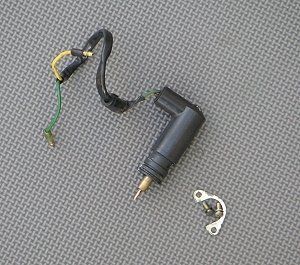
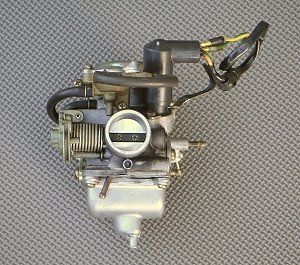
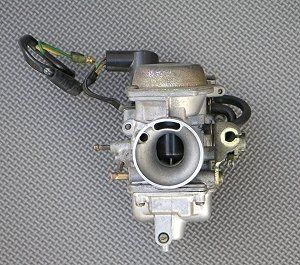
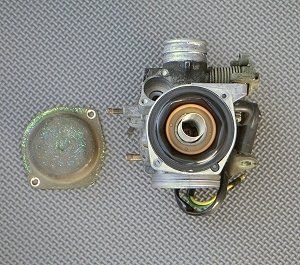
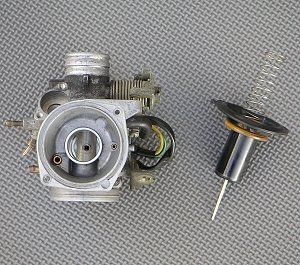
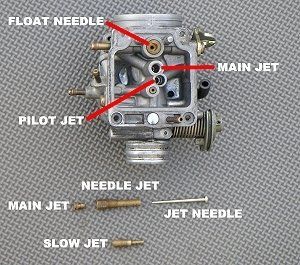
Jetting and understanding your CV carburetor


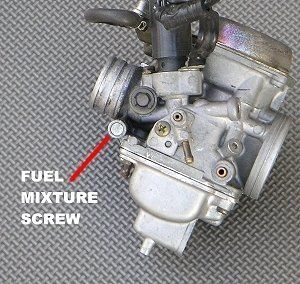
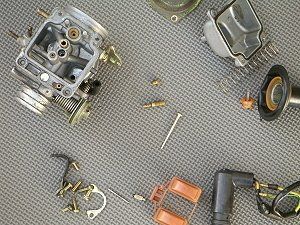
 What do all these pieces do? You may also ask, “how or why would I do this to my carb?” The goal of this article is to unravel the mystery of carburetor jetting. Before we can do that we need to understand what all the parts are and what they do. I suggest you read this article a couple times now, and later on while you tinker with your carburetor so things sink in.


 The modern carburetor is an incredible fuel metering device. I understand that fuel injection is the wave of the future but the carbs we have now are almost as good. The only downfall of a carb is that it can’t tell how cold the intake air is and it also can’t compensate for mechanical wear. Modern fuel injected motors know the temperature of the intake air and they can also adjust the fuel mixture of an engine while cruising. One day we’ll talk about “FI” but this article is all about “CV” or constant velocity carbs baby!

This picture is a CV carb from an Honda Elite 150. You can find the same basic carb in all types of scooters and even motorcycles. Someone reading this will be yelling, “ Hey, not all carbs are CV”. It’s true that some machines have slide carbs. So what’s the difference between a CV and slide carb?


 The CV is better than the slide carb and I’ll tell you why. When you turn the throttle on a slide carb the slide goes up and the engine takes on all the fuel and air it can take and more. You are controlling how much fuel and air the engine gets. While this may give your machine snappy acceleration it also lowers your fuel efficiency. The CV carb works in a different fashion. On a CV carb the throttle turns a plate that controls airflow behind the CV slide. The slide or vacuum piston in a CV carb is controlled by, you guessed it, engine vacuum. The result is the engine only getting the amount of fuel and air it can handle. The main reason CV carbs are superior is that they are not as sensitive to temperature and altitude changes. We’ll explain all this later in the article.

The carb pictured here is from a Honda Ruckus. Your carb may be more like this one. The Ruckus is very similar to the CH150 carb. but it has a throttle position sensor or “TPS”. The TPS tells the engine control module what is going on so it can adjust the ignition to let the engine run even better. The sensor itself is mounted at the end of the throttle shaft opposite of the throttle wheel (where the throttle cable attaches to the carb).

We are looking at one side of the Elite carb now. You can see the black thing with the wires on it? That’s the auto bystarter. Yes, auto bystarter, it’s a fancy version of a choke. Your scooter may have a manual or electric choke that richens the mixture while the engine warms up. When your engine is cold it needs more fuel to start and run the way it should. The choke or bystarter is used to insure that that all happens.

A bystarter is a fancy device that uses a needle to slowly block off a fuel enrichment circuit as the engine warms up. If you have a choke it can be the type that blocks or chokes airflow through the carb for enrichment or an SE valve. The “SE” valve or starting enrichment valve has a needle like the bystarter. When you engage the choke the SE valve pulls back the needle and enriches the fuel mixture. If your engine stops running the way it should it’s possible that your choke or bystarter system isn’t working properly. Sticky or kinked cables are always causing trouble with chokes.

If you look at the engine side of this carb you would think it’s much larger than it actually is.

In this picture you can see the airfilter/intake side which tells us it’s not so big. The venturi is where the carb necks down into the bore. Some carbs have a round venturi but others are like this one with a tall and narrow venturi. It seems like no one can agree on which dimension to measure on these types of carbs. The round venturi carbs are easy and have no debate. Measure the venturi and you have your carb size


 Now we’ll talk about how that CV thingy works. In the mouth of the carb you can see two holes above the bore. That’s where the chamber below the vacuum piston diaphragm gets the outside air. The outside air pressure helps the slide correct itself. This is one way the CV type carb is better than slide carb for differing altitudes and air temperatures. The air that comes in through these holes balance with the vacuum on top of the slide/vacuum piston diaphragm.

With the cap removed you can see the vacuum chamber of the carb. The cap seals the chamber and applies tension on the slide/piston spring.

To the right you can see slide or vacuum piston diaphragm. As the air passes below the slide, vacuum builds in the slide and vacuum chamber raising the slide and jet needle (you can see it sticking out below the slide). The chamber below the diaphragm (now visible with the slide removed) balances out how fast the slide raises with the intake air pressure. The piston/spring (sticking out above the diaphragm) slows down the speed that the slide raises by counteracting the vacuum in the upper chamber.

The needle is held in by a clip or needle holder. This needle holder has a spring that retains the needle but still allows for it to move. This is so the needle can seal with the needle jet correctly.


 When the slide raises the needle does too. As the needle raises more fuel is allowed to be sucked out through the main jet. The needle has an important part. The taper of the needle controls how much fuel is allowed to pass through the main jet at any given slide height. When the slide is at the lowest point no fuel can pass. When the slide is all the way at the top (at full throttle) the needle allows as much fuel to pass as the main can flow.


 Now we are going to get to actually jetting the carb. Some won’t appreciate all the info up to now but it was important to learn.

The float bowl is held on by four screws in this case. Your scooter may be different. Make sure you use a screwdriver that fits. The screws are easy to ruin. I like to use cap head screws to replace the soft OEM screws. Using the correct screwdriver also goes for the jets. Jets are more expensive than screws so only use tools that fit and take your time.

With the bowl removed you can see the float (burnt orange) and the tops of the pilot and main jets (center).

From the side you can see the float hanging down. As fuel fills the float bowl the float raises and shuts off the fuel supply. A float needle seals off the supply when the float is level with the base of the carb. You can blow into the fuel line fitting on the carb to get a better understanding of how it works.


 Incorrect float level is common and can cause all sorts of crazy problems. Many floats can't be easily adjusted but a level float is key to proper jetting so figure it out (^_^)

Anytime you increase the amount of air going into or out of your engine you’ll need to re-jet the carb. It’s important to remember jetting is all about checking to make sure you have the correct jets installed. It’s possible after making changes to airflow the jetting is fine but if you want the best performance you need to check first.

The jets you’ll be dealing with come in different sizes, an example is 105 or 95. A 105 jet is one that the hole is 1.05mm in diameter, a 95 is .95mm. If you don’t have access to a jet kit for your scooter you can drill the jets to size. When you drill do it by hand and remember the bit you use can make the hole one to two sizes larger than the actual bit size. If you drill too big it can be tricky to fix because you’ll need to solder the hole and start over. Use a little spit on your drill bit to make drilling more precise... It works so don't knock it (^_^) If you drill jets please file off the old numbers because the next guy will get all confused. Even you may forget you drilled those jets.

The jets in your carb may look different than the jets in the one pictured. Some slow jets look like the main jet shown here. The main fits into the needle jet and the jet needle sticks into the needle jet just like the parts are laid out in the picture, not all carbs have a removable needle jet. Needle jet, jet needle what am I talking about? The jet needle is the part that looks like a needle. The proper name for it is jet needle but plenty of people call this a needle jet. Call it what you like but just remember that the carb body is the one with a needle jet. The needle jet and slow jet have tiny emulsion holes that need to be free of crud. When you have you carb apart check to make sure the passages and jets are clean, your scooter will thank you for it!

There are all type of orders to go in when jetting your carb but the easiest, especially on a scooter is the main first. It may be hard if your pilot is wrong so don’t feel bad if you want to install a richer pilot before going onto selecting a main. The best main is the one that makes your scooter the fastest at max RPM and full throttle. Don’t go with what this or that guy said, go with the main that gives your machine the highest top speed. Finding the right main can be impossible if your engine is rev limited. Make sure your scoot doesn’t have some sort of restricted CDI before you go modifying things or you’ll go crazy changing jets trying to make it run.

When you’re selecting a main jet remember not to blowup your engine. It’s better to go too rich at first then try smaller and smaller jets until it runs the best. If your engine really wanted to breathe, and you helped it do that, then a 20% larger main is a good place to start. Most likely the main you choose will be less than 20% larger what your scooter came with.

Something to remember when jetting your carb is that colder air requires more fuel and hotter requires less. What this means is that if you tune in the warm part of the day then go ride at night, when it’s 20 degrees colder, you’ll have a better idea of how close your jetting is. If your machine runs better that night then your jetting is too rich. If your scooter runs better in the day when it’s warm then it’s too lean. This is the ultimate test for choosing the correct main. The main you choose should have your scooter running about the same in warm or cold temperatures. The same holds true for altitude. The higher you go the thinner the air. At sea level your scooter will need a richer mixture for the dense air and in the mountains you’ll need leaner jets for that thin air. If your scooter is set up for sea level even going over 2000 feet can make you too rich. A rich main can make your engine slower and miss or sputter and hard to start. A lean main will lack power and the engine may feel like it’s running out of gas at full throttle. Another sign of a lean mixture is a loud hollow intake sound. If you open up the intake system so it breathes better without richening the mixture you may notice that the intake sound is louder. Once you find the main that gives you the best top speed you can go to the next step.

I like to skip around so the pilot is next. The reason the pilot is next is because the pilot or “slow jet” is effective to ¼ throttle then finishes tapering off close to ½ throttle opening. The main jet starts at ¼ throttle but really comes on from ¾ to full throttle. We’ll get to the needle but that’s after we get the pilot set. Don't forget we are talking about CV carbs here so it's possible your slide is riding lower than you think for any given throttle position.

Let me stress this again, "don't forget we are talking about CV carbs here so it's possible your slide is riding lower than you think for any given throttle position." For example the Ruckus or Met isn't really off the pilot circuit until about 20mph. Of course the main can effect lower engine speeds but if your slide is only at 1/4" opening and your throttle is wide open you are still on the pilot. This is a major source of headaches for most people new to CV carb jetting.

The pilot jet uses the same fuel circuit as the idle mixture screw. A lean pilot can make your machine feel like it’s out of gas, idle too fast or just be gutless from idle to just past ¼ throttle. The air/fuel screw on your carb can be adjusted to provide more or less fuel as need be. The mixture screw is not to be confused with the idle speed screw. The idle speed screw rotates the throttle wheel just like the throttle cable does.

Your adjuster screw may be hiding behind a cap. The cap is there to keep you from tampering with it. You may need to drill out this cap so you can adjust the screw. If your screw is on the airfilter side of the slide rotating it counter clockwise will lean out the idle mixture. This is called an air screw. The reason is that rotating it counter clockwise allows more air into the engine thus leaning out the idle mixture. If your carb has the mixture screw after the slide on the engine side of the carb it’s a fuel screw. Rotating a fuel screw counter clockwise allows more fuel in the engine thus making it run richer at idle.


 Before you make any changes to your idle mixture screw turn the screw in while counting the number of turns until it seats. Write that number down so you don’t forget, then unscrew the screw to the proper setting. It’s possible that it wasn’t correct to start with so checking with the service manual for the proper setting is a good idea. To see how close your pilot jet is you can warm up your engine and adjust your mixture screw to see what happens. If the engine idles better with a richer mixture then you need a richer pilot. Though you can adjust the mixture screw to compensate for a lean or rich pilot it’s not the proper way to do it. A lean pilot will still be lean and using the mixture screw will only mask the problem. Once the pilot is correct you should find that the mixture screw is set close to the factory setting.

You’ll know if you have the correct pilot by using the information above and what you learned about the main. A rich mixture will make your scooter run better in that range when the air temperature or engine is cold. A lean mixture will run better in warm air temperatures and when the engine is warm.
 

Now we are back to the needle. This should be easy, what we want to do here is raise the needle in the slide until the engine runs the best. Some needles have clips that can be adjusted and others have fixed heads. If your needle is not adjustable you can use small washers to raise the needle. The washers need to be 1mm thick and the needle holder may need to be modified so it fits correctly. Make sure you don’t force anything when you work on the carb.

The needle is tapered as mentioned before. Raising the needle allows more fuel out through the main jet sooner. The normal operation for the needle jet is just before ¼ throttle opening until about full throttle when the needle is no longer blocking fuel flow from the main jet. After you are settled on your needle position and pilot take your scoot for a ride in warm and cold air to see how it runs. If you can’t really tell the difference between the two you must have done everything right. If you find that it’s too lean or rich go back and make adjustments.


Another nugget is to remember not to just zip up and down your driveway changing jets. If you have an electric choke it won't even shut off for about 10 minutes. You don't want your engine to run good in the first 10 minutes. You want your engine to run good when it's warm or better yet hot! Your goal is to have it start easy and be a little cold blooded. That means it should fire right up but need to warm up a little. I have had to make compromises and just shoot for the cold blooded and hard to start but do your best to get it perfect (^_^)


We can talk about different needle tapers, slide or “throttle valve” cutaways, shortening slide springs, modifying the holes in the vacuum piston and a couple other things but we covered the most important details and adding more would only make it more confusing. That’s it, either you’re really confused or enlightened. Jetting a carb is part science and part magic so it takes time to master it. The fact is that jetting is super important to learn. Not many shops take the time to jet stuff perfectly because no one wants to pay them for it. If your shop told you they spent four hours jetting your machine and handed you the bill my guess is that you would be angry. So if it this sounds like something you can do get out some tools, your scoot and start learning.


Want this article expanded on? Have a suggestion? Contact us.

Share by: